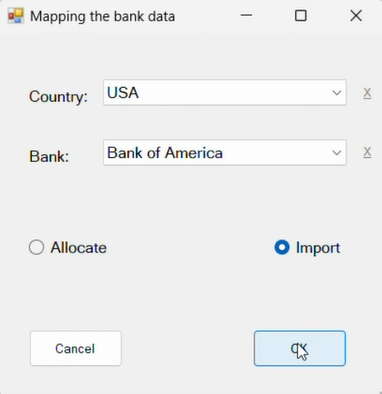
The following dialog is displayed.
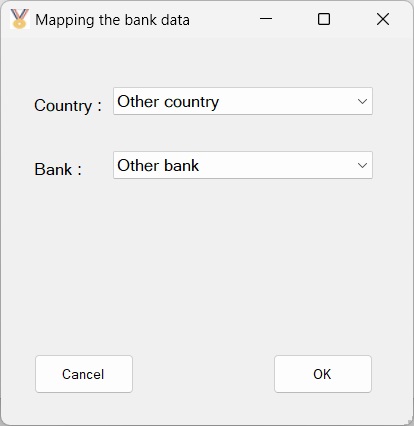
Setting up the Bank Mapping
Clicking OK, the following form is displayed.
This allows you to add bank accounts stored in the file mapbanks.dat saved in the same folder as the program.
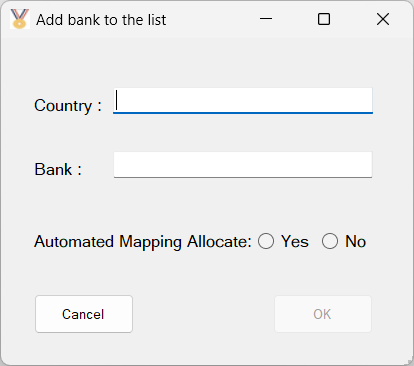
To remove a country from the drop down list, select the country and click the X besides the field.
To remove a bank from the drop down list, select the bank and click the X besides the field.
Automated Mapping Allocate
Yes - if the bank account assigns a category to transactions from a one-level dropdown menu, select Yes
No - if the bank account assigns a category to transactions from a multi-level dropdown menu, select No
Clicking OK opens the standard Windows dialog. Select the CSV file containing transactions of the specified bank.
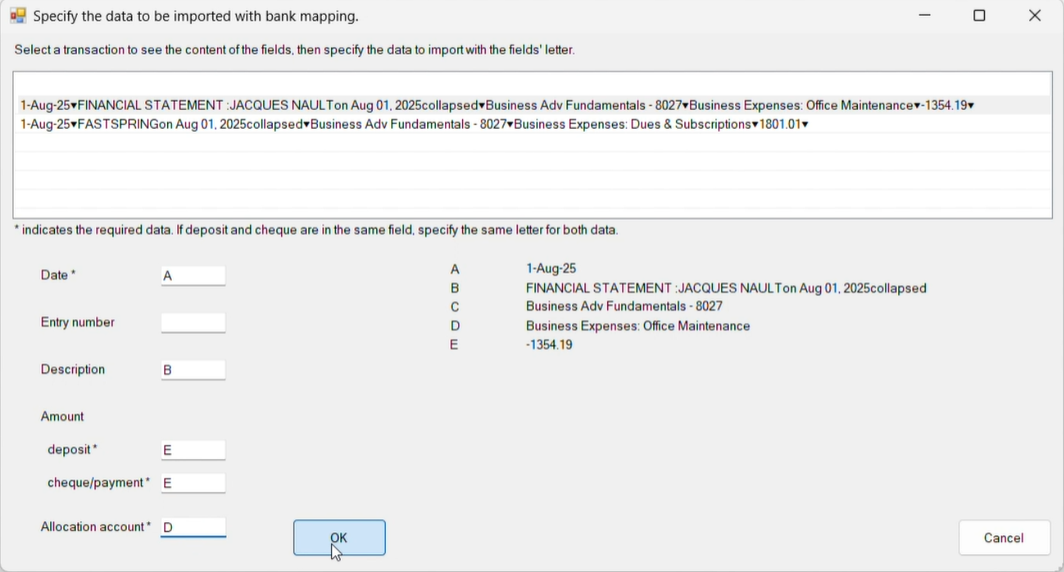
Once the file has been selected, the following form is displayed for you to specify the data to be imported.
Clicking OK opens the standard Windows dialog. Select the CSV file containing the list of categories.
Note: The list of categories is not uploaded when bank accounts permit category changes, since those categories are actually the accounts from the chart of accounts. Click Cancel in the standard Windows dialog.
Note: If you prefer to add allocation accounts directly in your transactions file, you can do so by using the Bank Mapping feature and setting it up like with bank accounts that permit category modifications.
The bank mapping setup is now completed for the specified bank.
Mapping Allocate
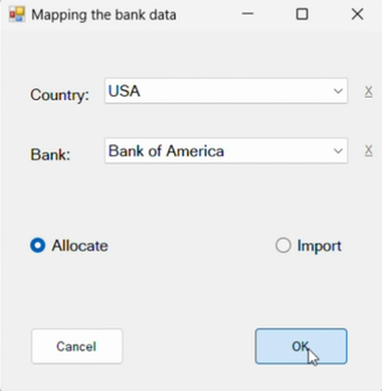
Mapping Import
For more explanations look at the JAQONO web page.