Get Started with a QuickBooks Online Company file
Demo files are installed on your Windows Desktop (in a folder called 'ExcelFSM Demo Files').
In an Excel blank workbook
- Click ‘Read Trial Balance Data’
- Click ‘Desktop’
- Click ‘ExcelFSM Demo Files’
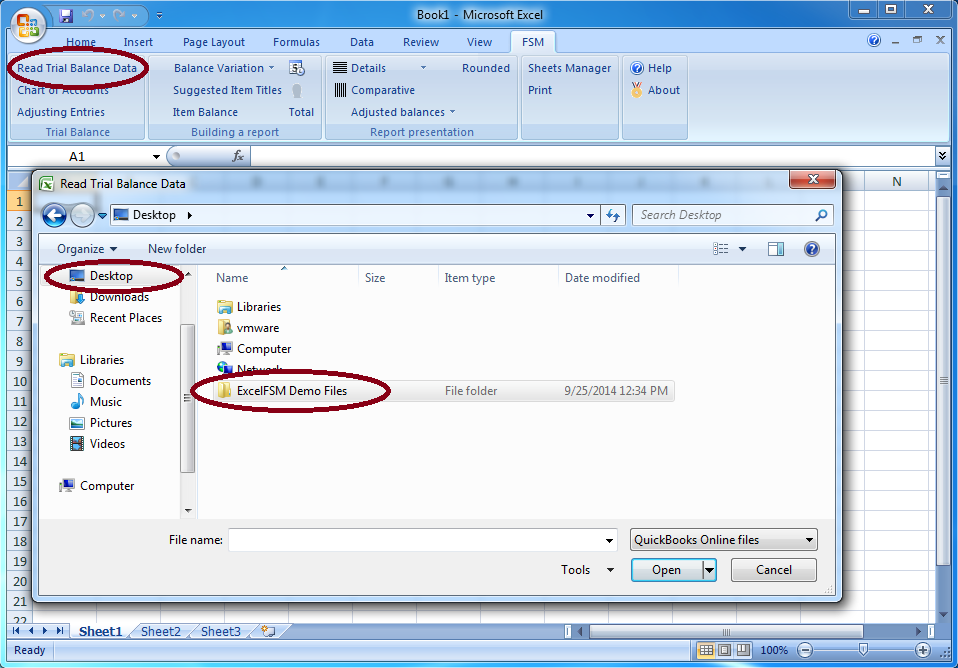
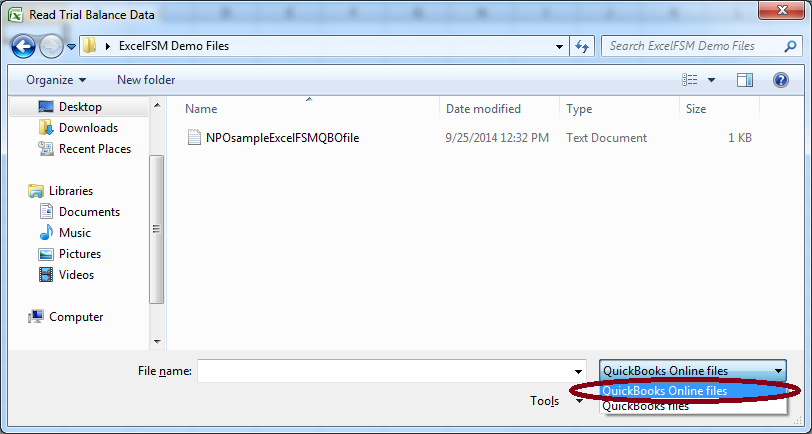
Select ‘QuickBooks Online’ as the file type (bottom right)
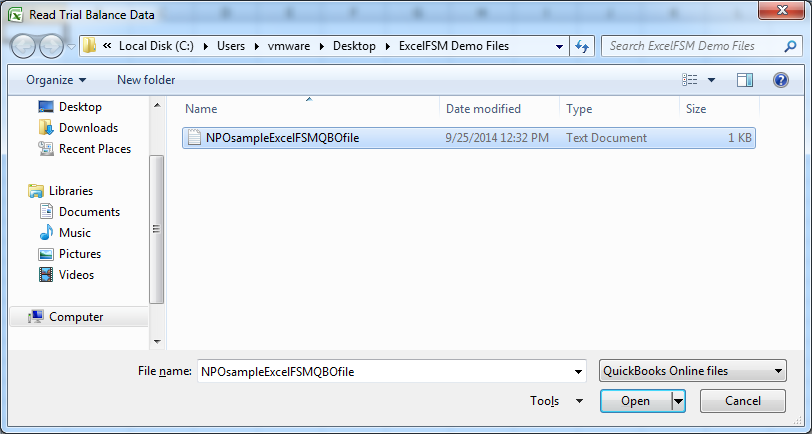
Select the ExcelFSMQBO company file
Specify the Name of enterprise ‘NPO’
Specify the As-of Date '12/31/2009' (in the NPO demo file, 2 trial balances are available: 12/31/2009, 12/31/2010)
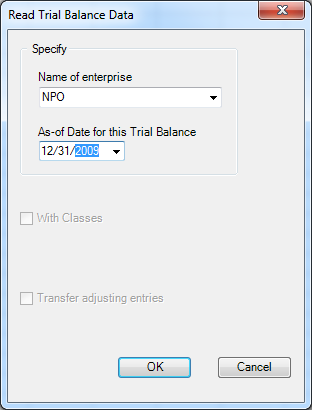
Click ‘OK’
Trial balance data is imported in Excel.
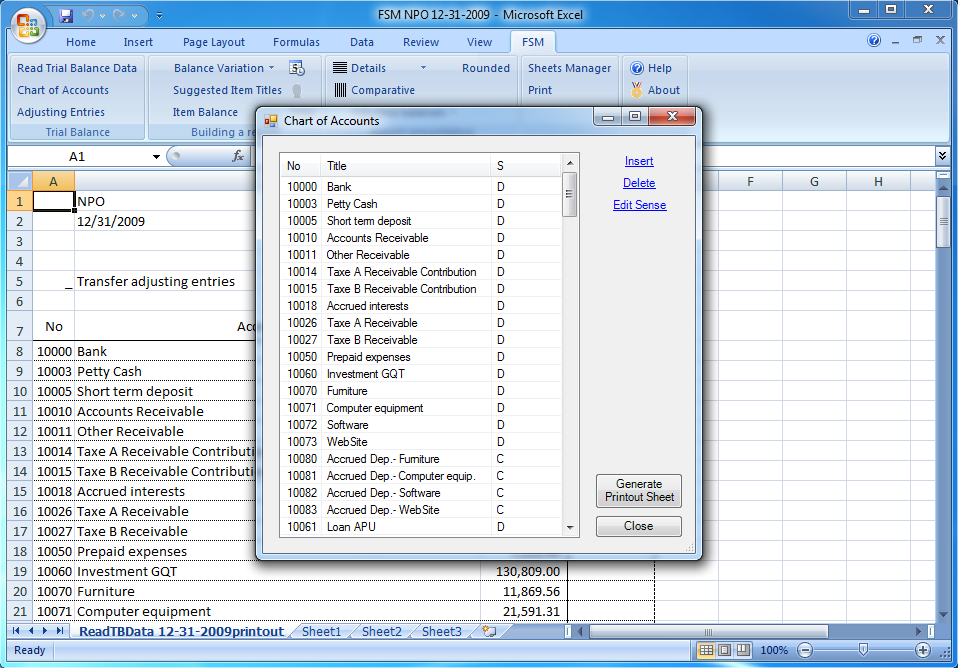
You can refer to the ‘Read Trial Balance Data’ topic in the Help file, and to the following video
![]() Importing Trial Balance Data / QuickBooks (1:40)
Importing Trial Balance Data / QuickBooks (1:40)
from offset 1.06 to offset 1.40. (offset 0.12 to offset 1.05 refer to QuickBooks Desktop software)
Continue
Click the ‘Read Trial Balance Data’ button, and select the NPOsample ExcelFSM QBO file again,
then specify the as-of date '12/31/2010'.
Being familiar with the ‘Read Trial Balance Data’ process, you can start using ExcelFSM with your own QuickBooks Online Company files.
Creating an ExcelFSM QBO Company File
To use ExcelFSM with your own QuickBooks Online Company file, you need to create the file that will contain the keys allowing ExcelFSM to access your QuickBooks Online Company file.
Click this link Creating an ExcelFSM QBO Company File.
Building a report
Read this document See how it works.
(Note: page 2-3 refers to QuickBooks Desktop software, and the 'With Classes' feature is not enabled with QuickBooks Online)
Watch the following video ![]() Building A Financial Statement (3:49).
Building A Financial Statement (3:49).
Refer to the Help file.
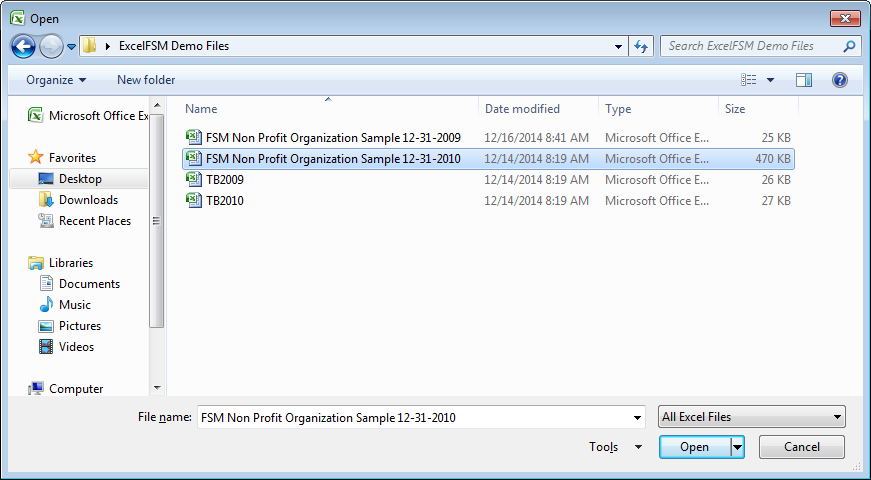
In the demo files, you can refer to the ExcelFSM sample workbook "FSM Non Profit Organization Sample 12-31-2010.xslx".
You can open it in Excel by double clicking its icon, or by performing the File | Open command from within Excel
Furthermore, look at the Tutorials
Feel free to contact us thru the Contact page if you have any question.