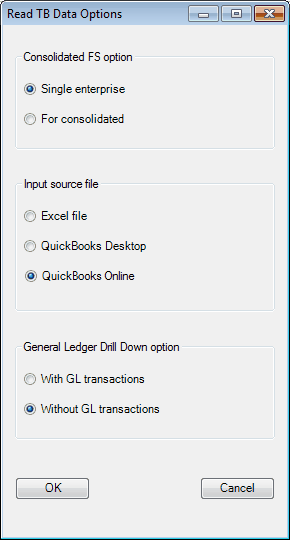
For Intuit QuickBooks Online files as input source file, ExcelFSM retrieves the data directly from the QuickBooks company file, without any need to export or reformat the data.
Setting up QuickBooks Online to work with ExcelFSM
An "ExcelFSM QuickBooks Online" company file must be created to allow ExcelFSM to read a QuickBooks Online company file.
To create this file, you will use the ExcelFSM QuickBooks Online Utility app. Before the file can be created, the Utility app must be connected to your QBO company.
(The following instructions are available with screen shots in this document https://excel-fsm.com/CreatingExcelFSMqboTokenFile.html)
Step 1 — Connect the Utility App to QuickBooks Online
Open a browser (Microsoft Edge, Chrome, or Firefox) and click https://excel-fsm.com/FSMQBO/
If you are not already signed in to QBO, you will be prompted to sign in.
After signing in, you will be asked to select the QBO company you want to connect.
Once you select the company, confirm the connection.
After the connection is completed, you will receive a confirmation email from Intuit.
Step 2 — Create the ExcelFSM QuickBooks Online Company File
In your QuickBooks Online (QBO) company, click the My Integrations icon, then click Manage integrations.
Under ExcelFSM, click Launch. (With QuickBooks Online Accountant, it can be launched from Client apps - by the Admin)
Alternative method: You can also open the Utility app directly by clicking https://excel-fsm.com/FSMQBO/
Click the Create File button.
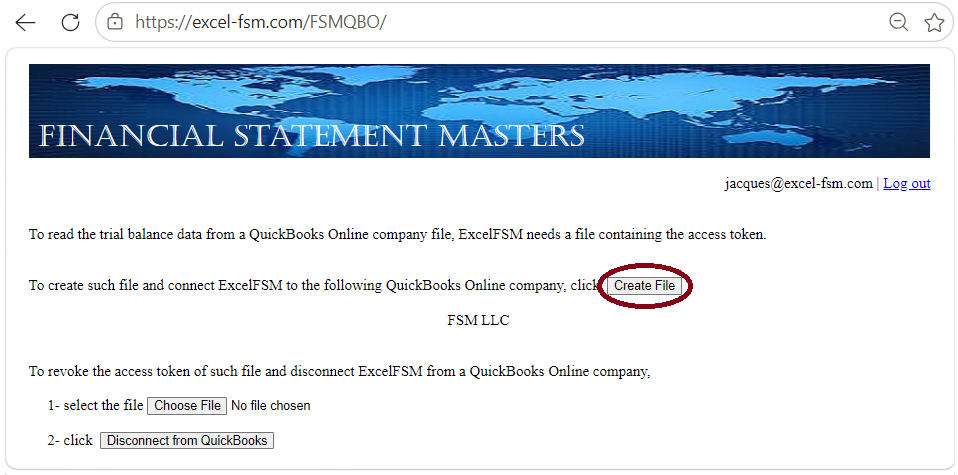
Save the file. Important — Do Not Use OneDrive
Do NOT save the “ExcelFSM QuickBooks Online” company file in a OneDrive folder. Saving it locally prevents sync‑related issues.
Reading the accounting data
Clicking OK opens the standard Windows dialog, with the type of file (bottom right) set to QuickBooks Online files:
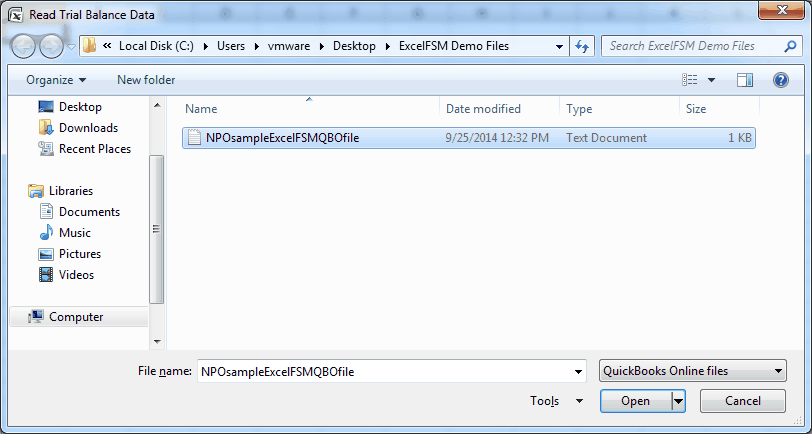
Figure 1: Trial Balance File selector
Select the file containing the desired "ExcelFSM QuickBooks Online" company file, and click Open.
ExcelFSM shows the following dialog to allow you to specify additional information about this trial balance:
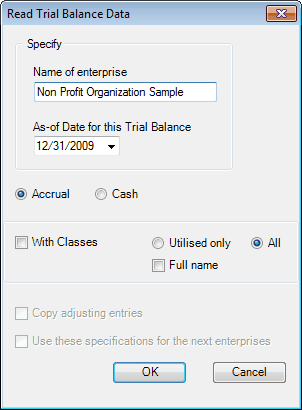
Figure 2: Trial Balance Information for QuickBooks file
Name of enterprise - The name of the enterprise identifies the Excel workbook (along with the as of date), fills the selected worksheet cell when the Enterprise Name button is clicked.
As-of-Date for this Trial Balance - The date of the trial balance will be used, along with the enterprise name, to identify the Excel workbook, to initialize a cell with the As-of Date button, to compute balance variation between two financial periods, as well as to select the Comparative periods balances.
NOTE: The above dialog (Figure 2) will be empty if it is a blank workbook. Make sure you put the right as-of date.
For subsequent financial periods, you will be updating an existing FSM workbook by reading the trial balance data with another as-of date. The above dialog will be pre-filled according to the previous financial period. It will be important that you update the as-of date to reflect the new period; otherwise, ExcelFSM will assume you are re-reading an amended trial balance for an existing period and, if you confirm to proceed, will update the existing period's data instead of processing a new period (Yes, ExcelFSM has the capacity to process amended trial balances and automatically update the financial reports). ExcelFSM has also the capacity to add prior periods to an existing FSM workbook.
Accrual or Cash - Select accrual basis or cash basis for the trial balance data.
With Classes - Check if you want the "classes" to be part of the trial balance. (Note that for QuickBooks Online, only the classes of the income and expense accounts are processed).
The classes will appear in the Chart of Accounts and identified by " | <Class name>:<Subclass name>" inserted at the end of the account's title.
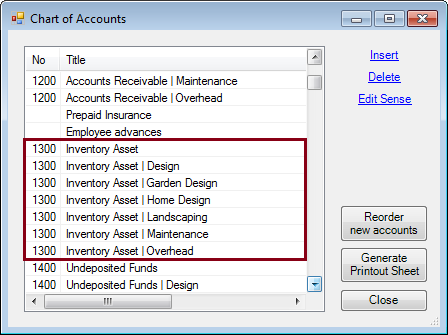
Utilised only - Select that option if you do not want the classes of an account not utilised to be part of the trial balance.
Full name - Check that option is you want the full name of the subclasses.
Copy adjusting entries - Check if you want to copy the current adjusting entries for the new financial period. You will be able to edit or delete these according to the new financial period. This feature is useful, for example, if the adjusting entries must be repeated one financial period after the other.
Use these specifications for the next enterprises - For Consolidated FS, check if you want to use the same specifications for the next enterprises. If this checkbox is checked, the Read Trial Balance Data dialog above will not be displayed for the remaining enterprises of the Consolidation list, and ExcelFSM will use the same specifications for these enterprises.
Results
Click OK. The following actions occur:
•The trial balance data is imported and organized
•A new FSM workbook is created. It's name is
<Enterprise> <As-of date>.
Note: If the workbook contains Consolidated trial balances, its name would instead be:
FSM <Parent Enterprise> <As-of date> Consolidated.

•A new worksheet named 'ReadTBData printout' is inserted into this workbook.
(The account's number and title are displayed in cell E1 during the process.)
•The Chart of Accounts is opened.
Updating the Chart of Accounts
If this is the first time the workbook has had a trial balance read into it, a Chart of Accounts is built.
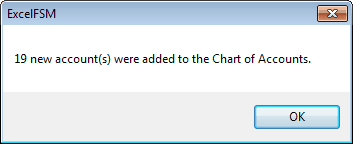
If the workbook contained previous trial balances, the Chart of Accounts, which was previously built, is updated. The number of new accounts that were added to the Chart of Accounts is displayed:
The new accounts are shown at the top of the Chart:
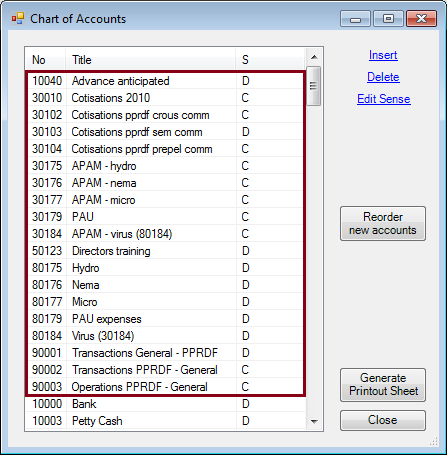
You may reorder these new accounts by dragging and dropping with the mouse or by clicking the 'Reorder new accounts' button, whenever you wish. A good time to do so is after you’ve grouped them into the proper financial reports Items.
Note: Account titles changed in the accounting software will likewise be changed in ExcelFSM.
ReadTBData printout
The ‘ReadTBData printout’ shows the data read by ExcelFSM:
•Name of enterprise
•As-of-Date
•With Classes (checked or not)
•Copy adjusting entries (checked or not)
•Data of the trial balance
•Number of accounts
•Computed totals for Debit and Credit
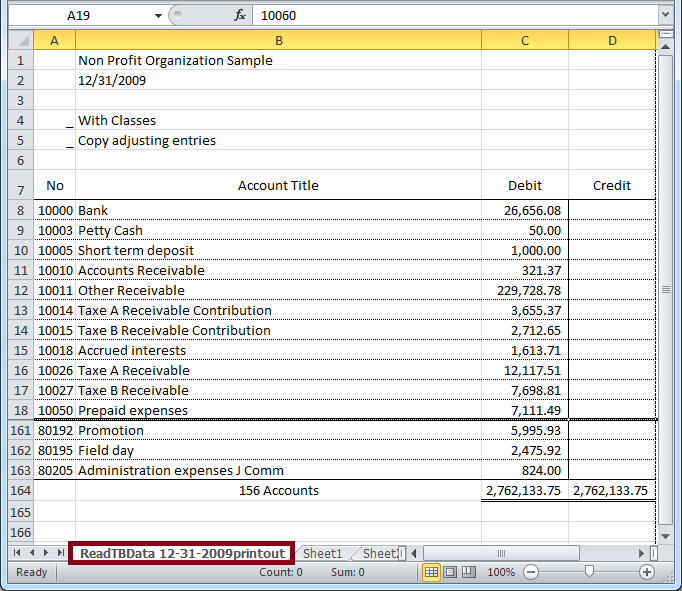
Note: The only purpose for this worksheet is to help you verify that the Trial Balance was read correctly. You may print it, delete it, etc.
Updated Reports
Any existing reports in your workbook are automatically updated with the new trial balance data:
•Item balances are updated to reflect the new account balances.
•Totals are then updated according to the new Item balances.
•As-of dates are updated.
•If Transfer adjusting entries was checked, the adjusting entries of the previous financial period are copied into the new financial period.
New Workbook created for each subsequent financial period

When the trial balance data for a new financial period (i.e. the As-of date has changed) is read and this new financial period is subsequent to the last financial period read, i.e. not a prior period added to an existing FSM workbook, the existing workbook is copied, and the new period's data is read into the new copy of the workbook.
Your original workbook will not be altered, and thus will contain only the data from the previous financial period. As more financial periods are read, you will retain a historical series of workbooks, one for each of their respective financial periods.
Note: Since the name of the workbook contains the Enterprise name and As-of date, the workbooks are easy to identify.
Note: Account balances of previous financial periods are preserved in the new workbook containing the latest financial period and are used for the Comparative presentation. However, you might need to access a historical workbook to see things like the Chart of Accounts as of a previous period, and the Adjusting Entries used in a previous period.